Saturday, February 26, 2011

Sew Much Sewing to Do

"Cherubim" AS&E issue 85

Being on vacation for a week certainly has allowed me to get some sewing done. When I work all week, I'm just too tired to spend time with my sewing machine. Which is a total shame if you ask me. Even though I do work at a fabric store and do get to at least be around fabric all day; it's not the same as getting to work on your own project.
This romper is a size 3 mos. and I made it for our district manager's new grandson-to-be (in a couple of weeks I think). I used a high-count cotton sateen found at Hancock Fabics. Anyway, I think it turned out pretty well. But as any of us who sew, there are a few things that I would have done differently. I will be the first one to say that I am my own worst critic. Most times no one else is as hard on my as I am on myself.
I have another dress, I'm in the middle of. If you want the truth; I have about 5-6 pieces that need sewn up. But that's for another day or maybe another vacation. My next vacation I'm planning for August right before the state fair. I always have more items planned that I can execute. Oh well, so is the life of a smockaholic. Wouldn't change a thing. Happy stitching!

Wednesday, February 23, 2011

Bishop Lesson 2 and New Spring Dress


"Pretty Poppet" AS&E issue 81
I know that most of the country is stuck on Mr. Groundhog's six more weeks of winter, but I just had to get a jump on warm weather clothes with this dress. Isn't it so much fun. At least, I had a fun time creating it! Isn't that why most of us who sew/quilt/embroider/smock do our chosen form of fun?! Here's to more of the same.


If you have the original smock plate from the issue 81, you'll notice that instead of stitching bullion rosebuds, which is what the pattern shows, I used groups of sead beads. I decided that the fabric didn't want rosebuds, but sead bead flowers.

This trim and the buttons on the back I found at a scrapbook and stamping store here in Boise across the street from Hancock Fabrics. Next door to the scrapbook store is a bead shop where I found the beads for my dress.

Even though these buttons are not the exact pink from the dress, when I saw them, I just had to have them for my dress. The dress was just screaming for polka dot buttons. So I listened to the dress and got the buttons. I did check the back of the package to make sure they would be okay for clothing.
Okay, next up is the next set of instructions for the bishop dress we started last week.
As you can see I've already completed row 7 from the smock plate. I did have to take out rows 4 thru 6 to make this for a newborn.
In the center, begin with a down cable; then stitch 2 more cables. Next stitch a baby wave, which it shows me starting in the above picture. (I've shown how to stitch a baby wave on the Bonnet Lesson 1 post)

After stitching a baby wave, go ahead and stitch 5 cables.


After stitching the 5 cables, stitch a baby wave, then 9 cables.
Here's the combination of stitches for rows 7 and 8:
(baby wave, 5 cables, baby wave, 9 cables, then begin again w/ a baby wave).
Next week we will be doing the last of the smocking on this bishop. How's everyone doing with the smocking so far? Leave me a question and I'll do my best to answer. Happy stitching everyone!


Tuesday, February 15, 2011

Smocked Bishop - Lesson 1

I need to start stitching up a couple of projects for more classes, but as I want to teach so many different things, I'm in a quandry as what project to teach next. I definitely want to do a bigger girls dress. Something in the size 3 - 6 range. Need to seriously sit down and make up my mind. Need to make it with a little more advanced stitches. The projects I've done for classes are mainly using two stitches. Maybe something with a little bit of picture smocking on it. Here's the instructions for Lesson 1.

1. This bishop has half space rows pleated. I've scaled the pattern and plate down to fit a newborn. If you've done a larger size you will want to follow the plate for the neckline. Five half-space rows on the sleeves and 10 half-space rows on the neck/shoulders of the dress. On the sleeves, count the pleats, divide by 2 to get where your center is. Then count that # of pleats and mark the center two pleats. Go to my Bonnet Lesson 1 for a pic and to see how to do cables. Also on YouTube are videos from Laurie on how to do smocking stitches. Her videos tutorials are the best. Do not smock on the holding row of the sleeves or at the neckline on this bishop. We will be stitching cables on Row 1 and Row 4. Using white floss and starting with a up cable, smock across sleeve. Normally I turn my work over at this time and go from there. But this time, start back in the middle and stitch an under cable, continue all the was across. (I used pink floss for easy in seeing  the stitches in the pics.)

2. In Bonnet Lesson 1, I show how to start back up smocking when you've stopped in the middle of a row to change floss. Now whatever stitch you ended in row 1 you will start with in row 4. They should be carbon copies of each other, not mirror image.

3. Find your middle again and you can see in the pic I'm now using a darker pink floss. In AS&E the instructions call for using light pink to do this next part. Begin with an over cable. Make an over, under, over combination, poke needle to back of work and then go down to just above row 4 and over one pleat and stitch an under, over, under combination. Trail your thread behind your work, do not tie off between stitches.


4. You can see there are 6 cable stitches between combos across the top. It is the same across the bottom set. You have just completed a sleeve!!!! Yeah for you, you did great!
Stitch the other sleeve and then count the pleats across the neck edge. I usually mark with a straigh pin every 100 pleats, in case I loose my place counting. If you want to mark every 50 that's fine also, whatever works best for you. Follow the same instructions for Rows 1 thru 4 of the sleeves, but it will take longer to smock the neck line.


5. This is what the back of my sleeve looks like after stitching the accent combos.

I'm sorry for the late posting this week, was a little busy getting ready for my class tonight. And I got a late start on smocking so I could take pics for this blog post. Teaching the class is not hard, but I do have lots of prep. I hope everyone is having fun following along, cuz I'm having a great time sharing with all of you! Happy smocking everyone!

Monday, February 7, 2011

Smocked Bonnet - Lesson 2


How did everyone do last week with their smocking? Great I hope! This week's lesson is how to do Bullions and Lazy Daisy stitches. So let's get started. Make sure you have removed the pleater threads before starting the embroidery. If you didn't use a milliner needle on the smocking, you need to use one now. I've tried using other needles and it just is too frustrating. Learn from my mistake.

1. I have to apoligize this pic isn't the greatest. Anyway, the center 2 pleats is where we want to start the first bullion. I've brought my darker pink thread up to the side of the center 2 pleats , then went through those 2 pleats. Do not pull your floss through the pleats just yet.

2. Next you are going to wrap the floss clockwise 6 times around the needle. Keep the wraps firm, but not too tight else you won't be able to pull your needle through the wraps. I hold the wraps firmly with thrumb and forefinger and then pull the needle with the other hand. If the needle does not pull through easily, just loosen up your wraps a little. It should now slide through with no problem.

3. When you get the floss pulled all the way through, poke the needle to the back side and knot off. Make 2 more rosebud centers. One to the left and one to the right. See next pic for placement.


4. Thread needle with lighter pink floss for the outer petals of the rosebud. Notice we are going to go through 4 pleats for the outer petals.


5. Wrap needle 10 times clockwise and pull the needle through. After finishing a bullion, you may need to gently move some of the wraps. Sometimes your bullion can look a little lopsided.


6. Form the second petal by going back through the pleats just before, doing 10 wraps. Knot off after finishing each rosebud.

7. For the leaves, switch to green floss. As you can see from the pic you bring your need up through the bottom of the rosebud then go through a few pleats. Do not pull the needle yet. Wrap the thread under the top of the needle.

8. As you can see, I've pulled my floss tight to the needle. Now pull the needle through and the floss straight up. Only pull until the floss is flush with the pleats. Not too tight or you risk distorting your newly formed leaf.


9. At the top of the lazy daisy stitch just made, secure the stitch by poking the needle on the top of the loop and pull thread through to the back of the pleats.


10. Stitch 2 leaves per rosebud. Next rinse out any blue marks left from the pleating process. Let air dry.

11. Next for the ties. I cut approximately 18" for my ties. Use fraycheck or whatever fray blocking product you like on all the cut edges of ribbon. Fold one end up about 1" and then again.


12. Using and all purpose sewing thread, weave the needle through the 3 layers of ribbon.


14. Pull firmly and then wrap the thread around the center and then take a little stitch in the side of the ribbon to secure.


15. I've attached the ribbon to my bonnet and added a premade bow to the top of the ribbon.


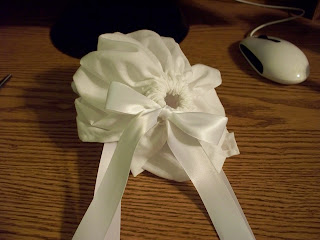
16. Thread a piece of ribbon measuring about 24" long using a bodkin through the casing at the back of the bonnet. Tie a pretty bow.

17. Ta-da! You've created a very sweet bonnet for an equally sweet baby. For my class I'm teaching, I've done the smocking in red and will add red ribbon roses to the sides. If you want to send me a pic of your finished bonnet, I will post it on my blog and brag about what a great job you've done. Give yourself a pat on the back for learning something new.  Here's my email: jmboyd@clear.net
Happy smocking everyone!